Word For Mac Split Table
After our someone asked for tips on dealing with tables. I write academic articles and my needs are pretty basic, so I have a simple workflow for tables. Design shack has a great entry on for information other than scientific data. I always start a table in since it’s so much easier to use keyboard shortcuts to add columns (⌥ → or ⌥ ←) and rows (⌥ ↑or ⌥↓). Pages also just make tables look better so it’s nice to use it at the beginning.
After I have the basic layout I transfer the table to a Word document and I merge cells where necessary and play with exact font sizes and alignment. I try to save as much of the specific formatting, cell merging and row ordering for Word even though it’s sometimes more tedious. Pages is particular about the cell width or height when next to non-merged cells and this particularity is often is carried to Word when transfered over. If you are working in Pages and can’t get the cell width or height right first try splitting the cells themselves as well as surrounding cells and then recombining until you can get the dimensions right.
MS Word for Mac 2011. This issue only occurred in the sections where I cut and pasted from a table. It seems to have hung onto the table formatting.
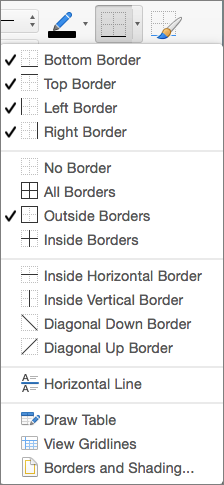
I have “Merge cells” set up with as a universal keyboard shortcut (⇧⌘M) to make editing smoother. I also find Pages pretty tricky for changing the order of columns or rows so I save that type of editing for Word. Editing borders in Word is tedious but functional; while it’s easier in Pages I find that sometimes this information gets messed up on transfer. The final step of editing tables is ensuring that they run smoothly across pages in your document.
In both Word and Pages there is a command to force the first row(s) to automatically appear at the top of the next page if the table continues there. Another useful command to control how a table appears on consecutive pages is “Allow row to split across pages” (only available in Word under Table Properties). Here is how these two commands can improve the appearance of your document: A table with vertical lines, where headings don’t repeat and rows are allowed to split between pages The same table properly formatted with the Headings Rows Repeat command, no vertical lines and no split rows Finally, two notes about table design. First, most tables don’t need vertical lines (as illustrated by two screenshots above). Second, it’s easiest to use a narrow font for tables. I used to use Arial Narrow which works well but is ugly.
I recently discovered Avenir Next Condensed (used in the table above). It’s a clean and really nice font which works well in tables because it’s compact.
You can easily merge and divide cells in Microsoft Word to make your tables more interesting and better suited to the data you are trying to share. When you merge two or more cells, you group them into a cell. When you divide a cell, you divide it from one cell into multiple cells. You can merge and split tables at the individual cell level as well as at the table level. In this article, I will show you how to merge and split table cells and tables in Word. How to merge cells in a word array Cell fusion in an array combines two or more adjacent cells of the same size in a larger cell. First, select the cells you want to merge.
They can be adjacent cells in a row or column. It can also act from adjacent cells spanning multiple rows and columns.
When your cells are selected, right-click one of the selected cells and choose the 'Merge Cells' command from the context menu. If you prefer to use the Word menus, you can also access the 'Layout' tab of the tools in the table, then click on the 'Merge cells' button. Anyway, your cells are now merged. How to divide cells in a word table The division of cells in a table in Word is only slightly more complicated than their merge.
You can use the split order for one or more cells in a defined number of rows and columns. Here is how it works. Let's first say that we only do one to divide a single cell into two cells. First select the cell you wish to divide. Then right-click the selected cell and choose the 'Split Cells' command from the context menu. (You can also access the table tools> Layout> Divide Cells on the Word Ribbon if you prefer.) This opens the Split Cells window. By default, it is configured to divide the selected cell (s) into two columns, which is exactly what we want. Excel for mac tutorial.