Can I Create A Bootable Usb For Mac Using A Pc
There hasn't been any physical installation DVDs available for Mac operating systems since Snow Leopard (10.6), with Lion (10.7) and Mountain Lion (10.8) both available via the Mac App Store as downloads only. So, if you wanted a backup install disc in case something went wrong, or in case you wanted to install Mac OS X on your computer without signing into the Mac App Store, you'd have to create a bootable DVD or USB drive yourself using the InstallESD.dmg, which. Unfortunately, that Disk Utility method does not work for the newest Mac OS X 10.9 (Mavericks) that was released as a free download on Tuesday. Technically, you can still use Disk Utility to make a bootable USB drive, but the process is more complicated than it's worth. There are a couple alternatives, though, and they're both fairly easy.
Method #1: Using Terminal Since we don't want to use Disk Utility anymore to make a bootable Mac OS X Mavericks install drive, we'll have to resort to the Terminal application on your Mac. Step 1: Download Mavericks from the Mac App Store Before we get to the USB drive part, make sure you.
After creating the bootable installer, follow these steps to use it. Connect the bootable installer to a compatible Mac. Use Startup Manager or Startup Disk preferences to select the bootable installer as the startup disk, then start up from it. Your Mac will start up to macOS Recovery.
Once launched, it's quite speedy--faster than the current Safari but not the Safari beta. The new theme was a bit shocking with its all silver/graphite look, but it will please the Safari crowd in that it doesn't look anything like something on Windows. Apparently, memory leaks have been addressed strongly and that's helped a lot to aid stability. (They'll still complain anyway.) Performance is good but still has a way to go before it's ready for everyone. Firefox download for mac os x 10.6. Startup and shutdown of the browser is slow.
Google Chrome feature shortcuts. Open the Chrome menu. Alt + f or Alt + e or F10 + Enter. Show or hide the Bookmarks bar. Open the Clear Browsing Data options. Ctrl + Shift + Delete. Open the Chrome Help Center in a new tab. Log in a different user or browse as a Guest. In windows it was possible to just type the domain name and then press Ctrl+enter which resulted in the www. And.com prefix and suffix being added automatically. Is there an equivalent on the Mac? Ctrl enter for chrome in mac mac.

Step 2: Format Your USB Flash Drive with Disk Utility Since the Mavericks install file is over 5 GB, you'll need an empty USB flash drive that's at least 8 GB in size, formatted as Mac OS Extended (Journaled). To make sure it's good to go, we'll just reformat it. Plug in your USB drive and open up Disk Utility. Though we don't want to use Disk Utility to make the bootable drive, we still need it to make sure the USB drive is formatted correctly. Select your flash drive from the left side in Disk Utility, then select the Erase tab.
Make sure the format is Mac OS Extended (Journaled), keep the name as Untitled, and hit the Erase button. If for some reason it looks like it's stuck on Copying installer files to disk., you might want to try again. I had to do this, and it worked fine the second time.
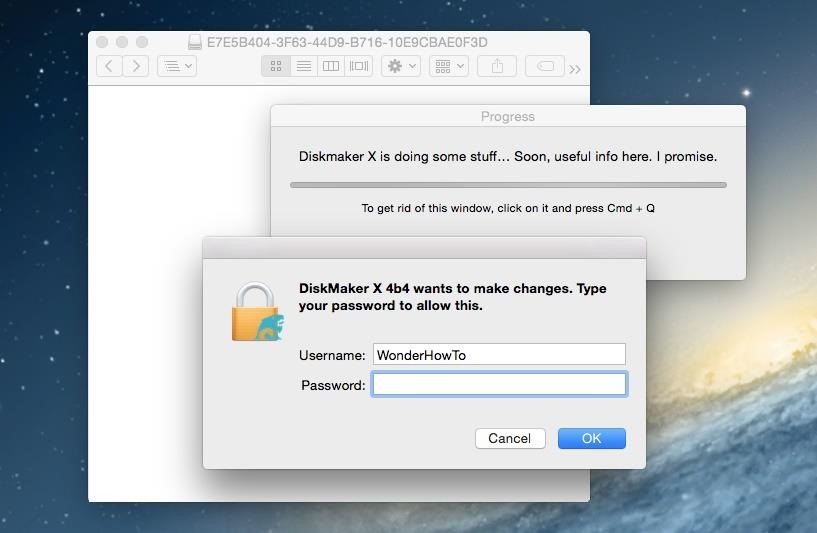
If that doesn't work, try another USB drive. Alternatively, you can use the next method. Method #2: Using DiskMaker X If you're not comfortable using Terminal on your Mac, is for you. This app has actually been around since Lion and Mountain Lion, and was previously called Lion DiskMaker, but it's recently been updated to work with Mavericks. It's free to download and use, but you can donate to the devs if you want.
Step 1: Download & Install DiskMaker X Just download and install it to your Applications folder. Also, make sure you already have the Install OS X Mavericks file there, too, and a properly formatted USB drive before continuing. Step 2: Run Through the Easy Instructions Now open up DiskMaker X and choose Mavericks (10.9). It will find the installer file in your Applications folder. Select Use this copy, choose the USB thumb drive option (if that's what you're using), select the partition you want to erase (e.g. Untitled), and hit Erase then create the disk.