How To Format External Hard Drive For Mac Os Sierra
A Step-by-Step Guide to Backing up Mac to an External Hard Drive. Note: the screenshots below are taken based on macOS 10.12.5 Sierra. If your Mac has High Sierra or an older version, differences may exist, but the process should look similar to what’s displayed below. Step 1: Connect your external hard drive. Where are the outlook for mac settings.
This Answer explains how to Partition and Format a WD Drive on macOS El Capitan, Sierra, and High Sierra.*END Critical: The instructions in the article below are designed to help repartition and format a hard drive. This process is Data Destructive and cannot be undone. Once the process begins, ALL THE DATA ON THE DRIVE WILL BE LOST!

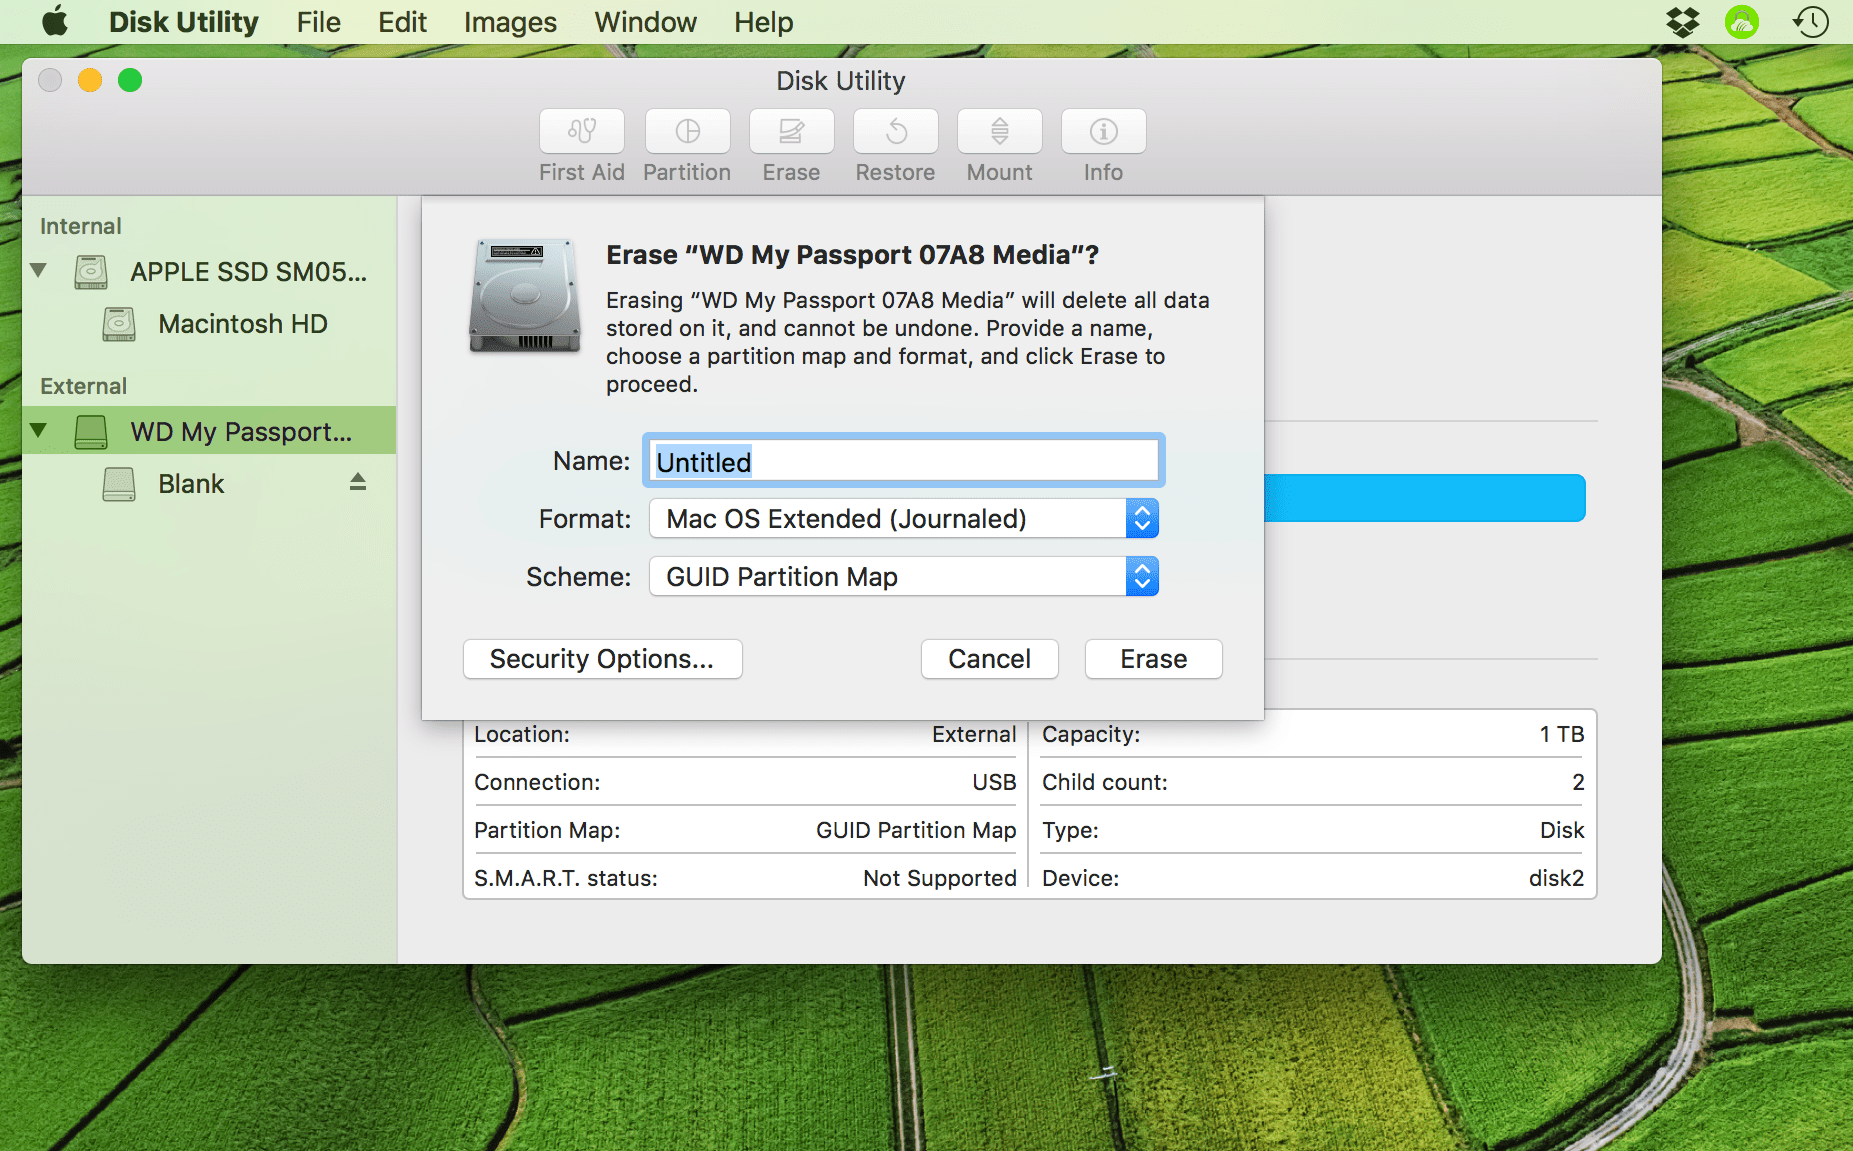
How to Partition and Format a WD Drive on macOS El Capitan, Sierra, and High Sierra Operating System Instructions macOS 10.11.x (El Capitan) and macOS 10.12.x (Sierra) macOS 10.13.x (High Sierra). Critical: The instructions in the article below are designed to help repartition and format a hard drive. This process is Data Destructive and cannot be undone. Once the process begins, ALL THE DATA ON THE DRIVE WILL BE LOST! Steps for macOS 10.11.x (El Capitan) and macOS 10.12.x (Sierra) • Open Disk Utility. Please See • Click the Eject button next to the external hard drive volume (My Passport, etc) • The drive will now be greyed out • Click the Erase button • Choose a new Format: Mac OS Extended (Journaled) Choose Scheme: GUID Partition Map • Type the drive new Name • Click the Erase button • When finished, the drive will be formatted and repartitioned successfully.
Click the Done button. Critical: The instructions in the article below are designed to help repartition and format a hard drive. This process is Data Destructive and cannot be undone. Once the process begins, ALL THE DATA ON THE DRIVE WILL BE LOST! Steps macOS 10.13.x (High Sierra) • Open Disk Utility. Please See • In the top menu bar, go to View, and choose Show All Devices • Click the eject button next to the drive volume (My Passport, etc) The drive Volume will now be greyed out • Select the drive (WD My Passport _____ Media, etc) • Click the Erase button • Choose a new Format: Mac OS Extended (Journaled) Choose Scheme: GUID Partition Map • Type the drive new Name • Click the Erase button • When finished, the drive will be formatted and repartitioned successfully.
Click the Done button In case the answer did not answer your question, you can always visit the for help from WD users.